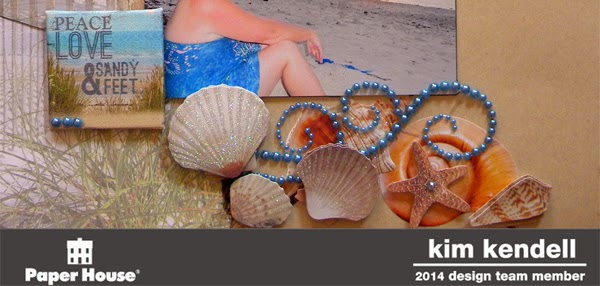
I think that the papers are just so awesome to use and made for the feel of this LO.
I also love the 3D stickers as they add beautiful dimension to the LO look at how good the shells are below and the amazing little canvas sticker with the quote is just so different.
Beach Comber LO
Requirements
1 x Beach Post 12 x 12 Paper
1 x packet beachcomber 3D stickers
1x Packet Beach Art Canvas Stickers
1 x Packet Beach Cardstock Stickers
1 x Packet Beach Die Cut Stickers
1 x Kraft cardstock
1 x Blue bling flourish
Photo Requirements
1 x6”x4” landscape photo
Tools
1 x Brown ink pad
Normal tool kit
Steps
1. Take the kraft cardstock and ink edges with brown ink
2. Take the Beach post Paper and tear down the left hand side approx. 4 inches in now ink all edges. Take the remaining piece and cut out some of the fence and the sign post see image of LO as a guide. Then ink all edges.
3. Take the cardstock and adhere the torn paper to the left hand side but make sure that under the torn side you take the border strip of shells from the cardstock stickers sheet and adhere that partially under the torn edge see image of LO as a guide. Then adhere the fence and sign post as per image of LO.
4. Now adhere your photo under the sign post
5. Take the quote from the canvas stickers and also add to the bottom left of your photo
6. Take your die cut stickers and add 2 large shells as per image of LO
7. Take the Beachcomber 3D stickers and add the beachcomber sticker over the beach sign post and then add dome of the shells over the sticker shells as per image of LO.
8. Your LO is now complete, I hope you like.
Thank you for looking Kim


No comments:
Post a Comment